

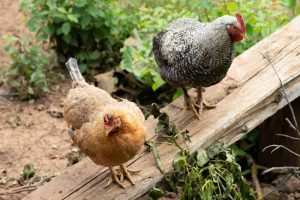
There’s something special about watching a mother hen care for her chicks. While incubators offer precise control over the hatching process, letting a broody hen hatch and raise chicks naturally can be incredibly rewarding and fun to watch.
This guide will help you understand how to work with your broody hen’s natural instincts to successfully raise a new generation of chickens.
Understanding Broody Behavior
A broody hen shows very distinct behavior when she’s ready to hatch eggs. She’ll stay firmly planted in the nest box, puff up her feathers when approached, and make soft clucking sounds. This natural maternal instinct makes her the perfect candidate for hatching and raising chicks.
The advantage of letting a broody hen raise chicks extends beyond the hatching process. Mother hens teach their chicks essential skills like foraging, dust bathing, and responding to danger signals. They also keep the chicks warm and protected, eliminating the need for a brooder setup.
Setting Up for Success
Before entrusting eggs to your broody hen, it’s essential to create the right environment. The nest box should be in a quiet, somewhat dark location away from the main flock’s activities. Line the nest with clean, dry bedding material and ensure it’s deep enough to keep the eggs at a consistent temperature.
The nest box needs to be large enough for the hen to turn around comfortably and should have good ventilation without drafts. A separate area that can be closed off from other chickens works best, as it prevents other hens from laying eggs in the same nest or disturbing the broody hen.
Last but not least, make sure the nesting box is easy to access for you when the hen takes a break from brooding. This will allow you to check the eggs (at first), and check on the chicks later on.
Choosing and Setting the Eggs
In many cases, the broody hen will have made the selection for you already. Sometimes though, that’s not the case and you will find her sitting on just one or two eggs – which gives you a chance to add eggs from other hens to her pile.
Select fresh, fertilized eggs for maximum success. Eggs should be no more than 7 days old when placed under the hen. They don’t need to be clean – the natural bloom on the eggshell helps protect developing chicks. Place 8-12 eggs under the hen, depending on her size. Smaller breeds can typically cover fewer eggs effectively than larger breeds.
Mark each egg with a pencil before placing it under the hen. This helps track any new eggs that other chickens might add to the nest, which should be removed promptly. Not only would adding eggs in the process mean that the pile gets too big (and it will become impossible for the broody hen to keep them all warm), it also doesn’t add up: once the first chicks hatch after 21-23 days, the hen will discard eggs that were added later and have only been sat on for a couple of days or weeks.
The marking also helps monitor if eggs get pushed out of the nest – you’ll know not to accidentally cook and eat a marked egg!
Note: you may need to re-mark the eggs from time to time, to keep the pencil mark from fading.
Supporting Your Broody Hen
During the 21-day incubation period, the broody hen will leave the nest only once or twice a day for about 15-20 minutes to eat, drink, and defecate. Place food and fresh water close to the nest box so she can quickly return to her eggs. Some hens are so dedicated they barely leave the nest – in these cases, bringing food and water even closer might be necessary.
Monitor the hen daily but minimize disturbance. A quick visual check ensures she hasn’t broken any eggs and has enough food and water. The best time to check is during her natural break from the nest. This also provides an opportunity to carefully check the eggs and remove any that might be broken.
The Hatching Process
Around day 18-20, you might hear soft peeping coming from the eggs. The chicks are developing their lungs and beginning to communicate with their mother. The hen will respond with soft clucks, beginning the bonding process even before the chicks hatch.
Hatching typically occurs between days 21-23. The hen will become even more protective during this time, and you might notice increased alertness and clucking noises. Don’t worry if some eggs hatch a day apart – this is normal. The hen will continue sitting on the nest until all viable eggs have hatched, and chickens can spend the first 24-48 under mother’s wings without the need for extra food or water.
Leave the hen and chicks undisturbed during hatching unless there’s an obvious problem. The humid microclimate under the hen provides perfect conditions for hatching, and her turning of the eggs helps chicks position themselves correctly to pip the shell.
Moving to the Brooding Area
You may have your broody hen in a safe and quiet location already – but if you don’t, you may want to move mother hen and her chicks to such a space once all eggs have hatched.
The brooding area should have:
- A draft-free shelter with good ventilation
- Chick-sized food containers and shallow water dishes, so the chicks can’t drown in them
- Clean bedding material
- Enough space for the family to move around comfortably
- Protection from other flock members and predators
This space should be draft-free, secure from predators, and separate from the main flock. Include a shallow water dish the chicks can’t drown in and a chick-appropriate feeder.
Once all chicks have hatched and dried (usually within 24-48 hours), carefully move the family to their prepared brooding area. Moving them at night often works best, as the hen and chicks are naturally calmer. Ensure the brooding area has:
Supporting the New Family
The hen will teach her chicks everything they need to know, but you can support their success by providing appropriate nutrition. Offer chick starter feed and ensure fresh water is always available. The hen will show her chicks how to eat and drink.
Watch for signs that all chicks are eating well and staying warm under their mother. A content family unit will show active chicks that periodically return to their mother for warmth, and a relaxed hen that alternates between feeding herself and caring for her brood.
Gradual Integration
Around 4-6 weeks of age, depending on weather conditions and chick development, the family can begin supervised integration with the main flock. The hen will protect her chicks from aggressive behavior, but monitoring these interactions helps ensure a smooth transition.
Start with short supervised periods during the day, gradually increasing the duration as the chicks grow and the flock accepts them. By 8-12 weeks of age, most chicks can be fully integrated with the flock, though they’ll likely stay close to their mother until they reach maturity.
Troubleshooting Common Challenges
Sometimes things don’t go perfectly, and that’s normal. A hen might abandon her nest if she feels too disturbed or threatened. In other cases, only some eggs might hatch. Don’t remove unhatched eggs too quickly – some chicks take longer to hatch than others. However, if eggs remain unhatched several days after the others, you can remove them (and it’s likely the hen will no longer be sitting on them anyway).
Watch for signs of mites or lice on the broody hen, as sitting in one spot for an extended period can make her more susceptible to parasites. Regular health checks during her brief breaks from the nest help catch any problems early.
With proper support and minimal interference, a broody hen can successfully hatch and raise a clutch of chicks. This natural process not only provides a wonderful learning opportunity but also results in well-adjusted chickens that learn essential skills directly from their mother.

0 Comments